What is Tumblr?
Tumblr is a popular microblogging platform that allows users to post a variety of media and connect with other users through follows, reblogs, likes, and other features similar to most social networking sites. While nowhere near as customizable as wordpress, the simplicity of maintaining a tumblr blog and its potential for connecting with a wide network of users makes it a useful marketing tool for any organization. Tumblr is also fully customizable (it allows you to add custom CSS, HTML, and javascript!) and creating a custom tumblr theme to help your blog better reflect your, or your organization’s, image is surprisingly simple once you get a hang of all of the tools provided.
Signing Up and Creating Your Tumblr Blog
The great thing about tumblr is that it literally takes less than five minutes to get a blog off the ground. Just go to http://www.tumblr.com/ put in your email, create a password, tell them how old you are (this is to prevent minors from having access to adult content), and prove you’re not a robot. The site will then take you through a brief walkthrough of some of its features, after which you’re free to start blogging.

If you want to create a brand new blog, either because you want a different url for your blog, or you just want a separate blog for separate content, then creating a new blog is super easy too. Just click on the arrow next to your tumblr URL, and click add a new blog. That’s it. I’m not really sure if there’s a limit to the number of blogs you can make on one account, but as of writing this my account has eight.Once you’re registered and have your email verified, you can immediately start adding posts through tumblr’s dashboard. Simply click on the ‘posts’ link on the right side of the page, and choose which kind of post you want to well…post. The current options are text posts, photos, photosets (created simply by adding multiple pictures in a photo post), quotes, links, chatboxes, audio, and video.
Giving Your Tumblr a Custom URL
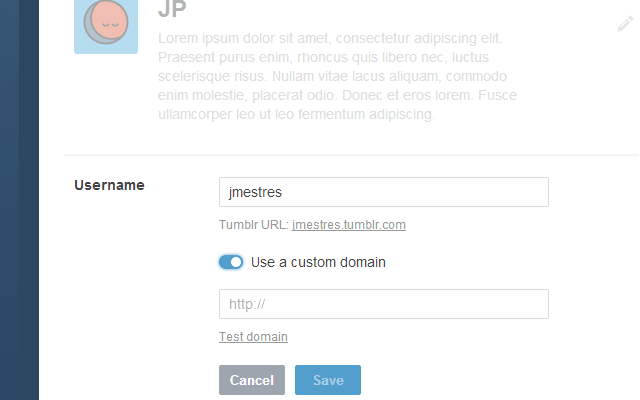
That’s super simple too assuming you already own the domain you want. If you want your custom url to be www.example.com then make sure you have your A-Record pointing to 66.6.44. If you want to use tumblr as a sub-domain (e.g blog.example.com) then point the C-Name to domains.tumblr.com (don’t worry, your registrar will either have instructions on how to do this, or be willing to do this for you). Then all you have to do is click on the the gearbox in the dashboard, click the pencil next to your tumblr’s URL, and type in your custom URL. Then you’re done.
Customizing Your Tumblr Blog
Fortunately, tumblr comes with a wide range of free and premium themes. However, my favorite thing about tumblr, is that unlike other free blogging services, tumblr’s styling is completely and easily customizable. If you know even a moderate amount of HTML and CSS (or know someone you can coerce into helping you out), you have everything you need to build a beautiful and fully custom tumblr theme.
Every tumblr blog is essentially just a single html file that uses tumblr’s system of blocks and variables to render all of its dynamic content. Tumblr provides very detailed documentation for all of their blocks and variables here. In next week’s article we’ll dive further into the specifics of designing a new theme as the posted link can be a bit intimidating for anyone who hasn’t worked with tumblr before, but for now I’ll skim through some of the basics to show how easy a custom tumblr theme can be to build.
Tumblr Blocks
As you’re buidling your tumblr blog, you can structure and style it as you would any other page. The only thing to keep in mind is that all dynamic content is rendered with what tumblr refers to as ‘blocks’. For example, to display your photo posts, you would enter something like
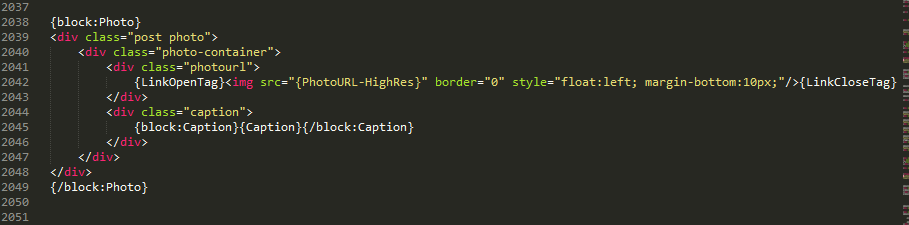
Any variable that includes ‘block’ is essentially a function that tells the server something along the lines of “For each piece of this kind of content that exists, print it here. Otherwise, ignore this”. In this example, we have a photo block and a caption block. For every photo post there is, the server will spit out the HTML as shown. The actual photo is displayed using the {PhotoURL-HighRes} variable and the caption is displayed using the {Caption} variable. If there isn’t a photo, this whole section gets ignored and nothing shown here gets printed. The linkopentag and linkclosetags wraps the photo in an <a> tag that automatically links the image to the appropriate page for that post.
Index/Permalink Pages
If you’ve looked through tumblr at all, you might be confused by the idea that everything you see on a tumblr blog is being rendered through a single document due to the fact that you can view each post as a separate page. While tumblr does have a lot of things running in the background, the user can in fact control everything through a single document. Separating the rendering of the main index page and the individual post pages is done through the blocks {block:indexpage}{/block:indexpage} and {block:permalinkpage}{/block:permalinkpage}.
There are different methods in structuring your page and posts, but my preferred method is to separate out my posts like this:
<body>
{block:indexpage}
All content that’ll be displayed on your front page.
{/block:indexpage}
{block:permalinkpage}
The layout for each individual post.
{/block:permalinkpage}
</body>
Keeping everything related to your blogs front page in one section of your document, and all of the permanent page structure in another section will make it much easier to keep track of how each post is being rendered and styled.
And Beyond
With just this, you should have everything you need to get a respectable blog up and running right now. However, there’s so much more you can do with tumblr that I wasn’t able to cover with just this one article. Check back next week for a guide to creating a custom tumblr theme based off of the Redux theme. In the following weeks we’ll discuss connecting your tumblr to other social media platforms to better coordinate your social media campaigns, the best way to add mobile functionality to your tumblr theme, and best practices as far as blogging and getting the most out of it.